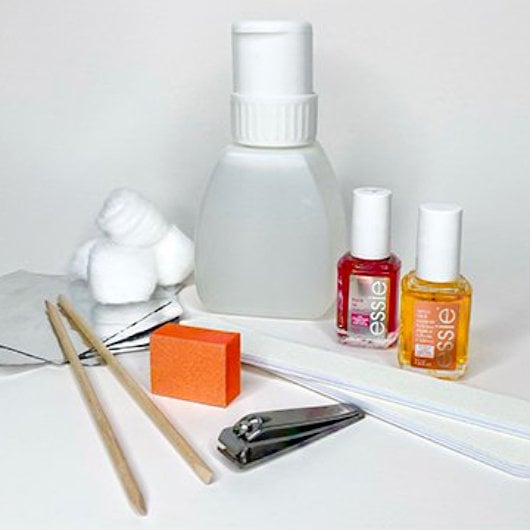
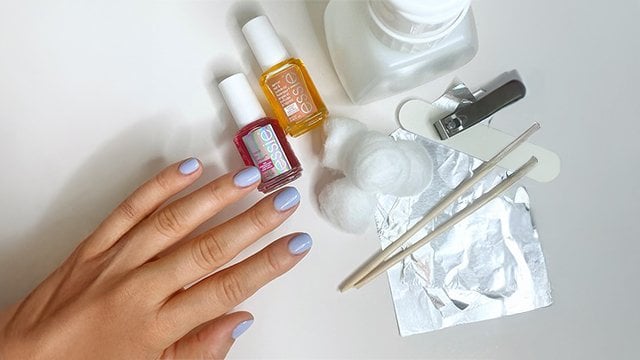
what you need for removing gel nail polish
- 1 paper towels
- 2 nail file (180 grit)
- 3 100% pure acetone
- 4 cotton balls or rounds
- 5 tin foil: cut into 3-inch squares, one for each finger
- 6 orangewood stick or cuticle pusher
- 7 nail buffer (240 grit or higher)
- 8 essie apricot cuticle oil
- 9 timer
- 1
trim nails
begin by removing any extra length from the nail with a nail clipper. if you’re not looking to hold onto extra length, doing this before soaking will speed up the removal process. tip: always work above a paper towel that you can roll up and throw away at the end.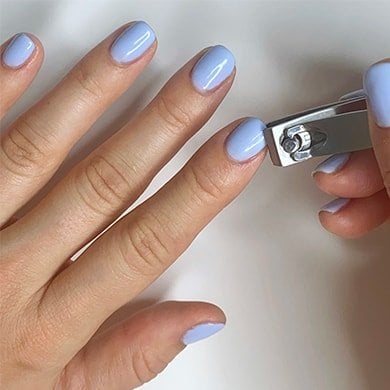
- 2
file gel surface
next, with a 180-grit nail file, file the surface of the gel. remove all the shine and some of the gel density where possible. this will make it easier for the acetone to penetrate, soften and lift away the gel.
- 3
protect your cuticles
before applying the remover wraps, apply essie apricot cuticle oil to each cuticle. removing with acetone can temporarily dehydrate and this provides a hydrating barrier to each cuticle in the process.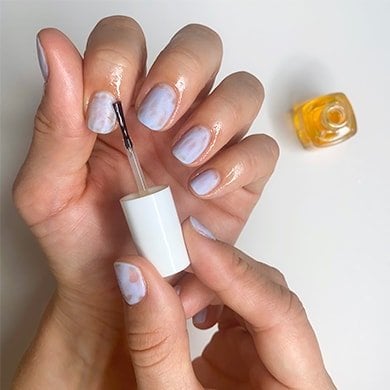
- 4
soak nails in acetone & wrap
working one finger at a time, soak a cotton ball in 100% pure acetone and apply it directly atop of the nail. next, wrap it tightly with 1 or 2 squares of tinfoil, aiming for an airtight seal.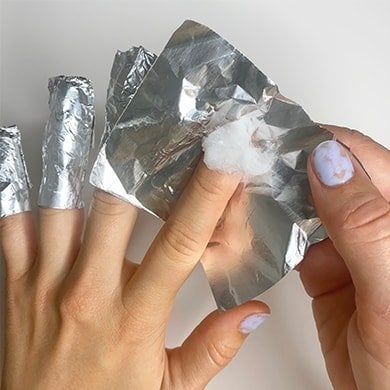
- 5
wait 10-15 minutes
once all of the nails are tightly wrapped, wait 10-15 minutes before checking the progress. because acetone easily evaporates, checking on the nails before the 10 minutes are up can add time to the removal.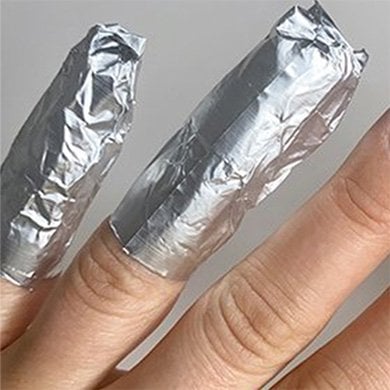
- 6
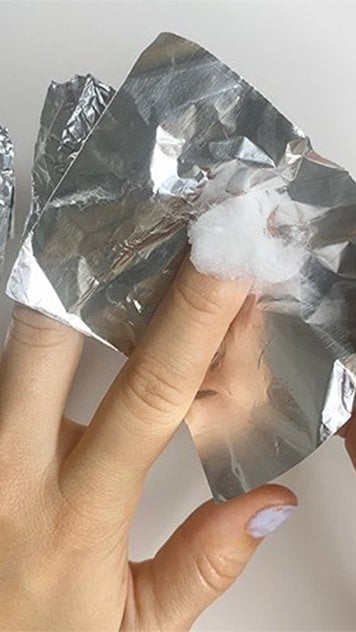
check the foils
check on the first nail that you wrapped by gently removing the foil and cotton ball. if the gel is raised and flaking away (as pictured), it’s ready to remove. if not, wrap another acetone cotton ball to the nail and wait another 5 minutes.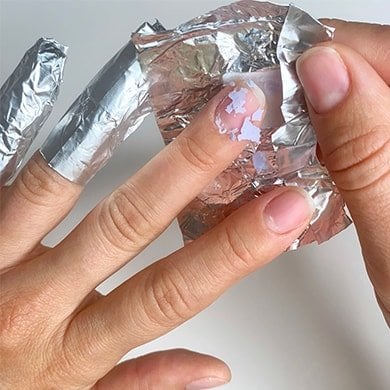
- 7
remove the gel
if ready, remove the wrap and lightly push away the excess with an orangewood stick (or a cuticle pusher if preferred). always push down the nail to the tip, rather than upwards towards the cuticle. this direction is more gentle and less likely to cause splits or damage.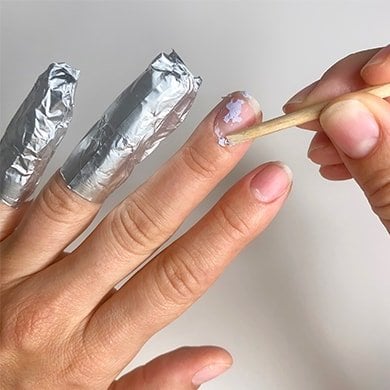
- 8
buff nails
once all the gel is removed, it’s common to have some residue left on the nail. smooth the surface by lightly buffing each nail with a 240 grit (or more) buffer. refine the tip of the nail with a file and the removal is complete.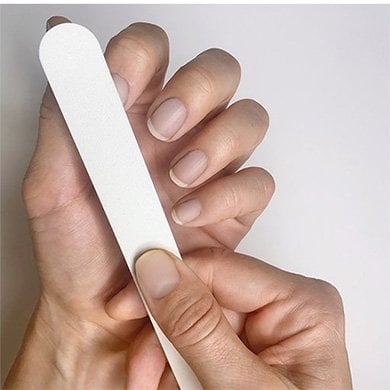
- 9
hydrate and treat
if harsh UV light was used to apply and cure your gel nail polish, chances are you’ll need a nail treatment or two to nurse them back to health. after removing gel nails at home, rita recommends fortifying your nails with a hardener like hard to resist advanced nail strengthener.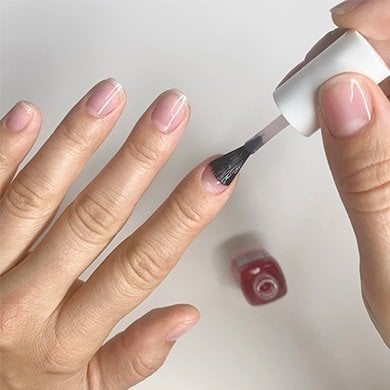
common mistakes when removing gel nail polish
removing gel nails at home requires a bit of patience. one of the most common mistakes is not soaking long enough, so set a timer and check one nail before taking off all the foils. but don’t wait too long either: acetone only removes most of the gel polish, no matter how long it stays on.
another important thing to keep in mind is your nails are extra fragile after the gel nail application process. do not use any sharp objects on your nails and be more gentle than usual until they get healthy and strong.
what to know about gel nails and gel removal
water passes through our nails at about half the rate when we wear a coating like gel or acrylic. after removing gel nail polish, it’s common for nails to feel slightly softer because they’re in a different state. give your nails 24 hours to return to normal.
now that you’ve removed your gel nails, consider a gentler alternative to UV gel manicures that looks just as great: essie gel couture longwear nail polish. our 2-step system provides long 15-day wear and a gel-like shine, but it comes off like regular nail polish.
please also note that not all gels are created equal.
- - hard gels can only be filed off, preferably by a professional manicurist.
- - if you’re wearing builder or BIAB gel along with gel polish, it’s important to file down a lot more of the gel thickness before soaking with acetone. this will speed up the removal process.
once you’ve followed all the steps for removing gel nails at home, be sure to reset your natural nails by making them stronger, healthier and moisturized. apply a nail strengthener or treatment and a cuticle oil. they’re your best allies for getting your nails back in shape.
shop gel removal at home must-haves
gel removal faq
- most gel nails can be soaked off with acetone, as explained above. use a file before removing gel nail polish if you also have builder or BIAB gel, which thickens the polish layer. if you have hard gel nails, have a professional file them off.
- nail salons use 100% acetone to soak off gel nails, just like in this tutorial. they also saturate cotton balls and wrap nails in foil before soaking for 10-15 minutes.