
how to choose the right nail shape for you
ready to play with new nail shapes? enjoy these tips and advice from essie lead global educator on
how to find the best nail shape for your next manicure.
when choosing a nail shape, there are a few things to keep in mind: your natural nail width, your nail length and your style. if you’re unsure where to start, choose a shape that most closely resembles the shape of your cuticles, ie: if you have straight cuticles, choose a square shape. this trick will give you the most balanced and sturdy nails, but don’t feel limited to just this method. there are plenty of shapes to suit every style and every nail type! here are a few of the most timeless and requested shapes.
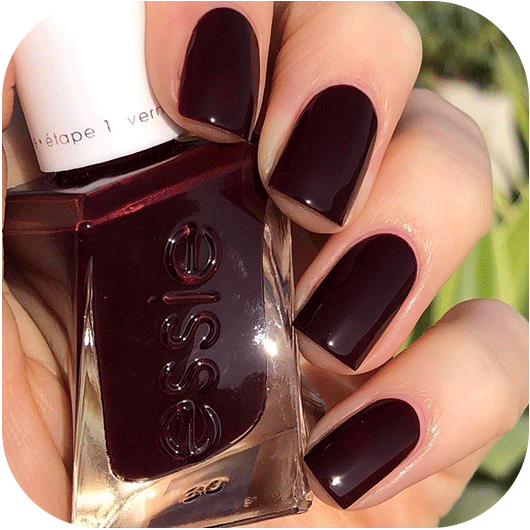
square nails
this timeless nail shape is also one of the strongest. because it respects the full width of the nail, those who wear a square shape often notice that their nails withstand bumps and stress much better than their curved or rounded counterparts. square shapes are very versatile and work beautifully on very short and very long nails. they especially flatter narrow or super short nails. if you have a very wide nail plate, you may want to opt for a slimmed version of a square nail, like a squoval or even a ballerina. image courtesy of @emmaheartssnails on instagram.

how to do square shaped nails
to create the square shape, begin by trimming the nail straight across with a flat edge nail trimmer. remember to hold your nail straight as you do to prevent any accidental angles. it’s also important to consider the direction your nail is growing when shaping a square. if your nail grows on a slight angle, don’t trim or file your nails in that direction. this is an opportunity to straighten it out and correct any angles. once nails are trimmed, refine the tip by filing straight across. remember to never slant the file. finally, check the corners. if there are any super sharp edges, give them a light buff with the file. do not over file! over-filing the edges will give you a squoval shape.

squoval nails
the combination of a square and an oval, squoval nails are flat at the top and curved at the sides. they’re universally flattering so if you’re unsure which shape to choose, opt for a squoval. they’re easy to maintain, never out of style and look beautiful on any width or length, but especially short to medium. Image courtesy of @nailsenvacances on instagram.
how to do squoval shaped nails
to begin a squoval shape, you must first shape your nails square. trim straight across the nail with a straight edge nail clipper and follow by refining the tip with a file. using the file, lightly soften the corners. you can do this by lying the file vertically against the side of your nail and gently filing inward on an angle. file in one direction, not back and forth. this may accidentally over-file the area, leaving you with a rounded nail.
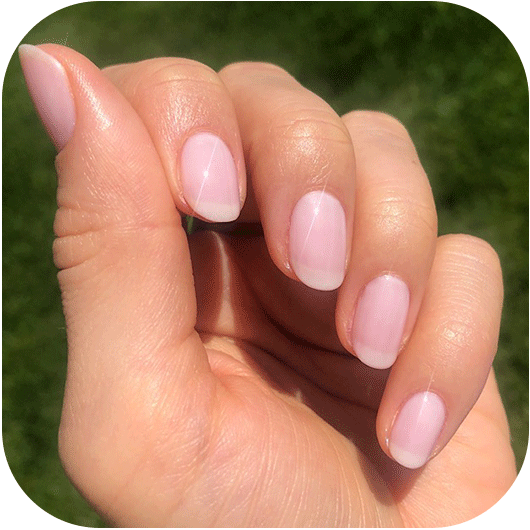
round nails
round nails are the most natural and easiest to wear of all of the nail shapes. they’re easy to shape, low maintenance and, because they’re entirely curved, they have no sharp edges or corners to snag on clothing or surfaces. this shape is recommended for anyone, however you may want to opt for a squoval if your nails are very short. rounded short nails tend to look like little circles – not ideal! image courtesy of @ritaremark on instagram.
how to do round shaped nails
a classic round shape never contours the sides of the nail. your nails should preserve their natural width, but be round at the tip. with a curved edge nail clipper, trim the nail in a round shape. next, refine with a file. remember that the highest point of the nail should be directly in the middle. if your nails are long, file the sides of the nail perfectly straight; maintaining the width.
oval nails
think of oval nails as an elegant round nail; the curvature is gradual and slightly more dramatic. to create an oval nail, you’ll need a bit of length, or nails that have grown beyond the fingertip. this shape looks especially best on those with a rounded cuticle area; it creates a nail with a true oval shape. Image courtesy of @worldofcolor on instagram.
how to do oval shaped nails
the difference between filing a round shape and an oval is all in the sides. when filing a round nail, you only round out the tip and keep the sides straight. however, an oval is rounded at the sides as well. begin by defining the middle of the nail as the highest point of the curve then, working from the base of the tip, begin to file in towards the tip on a very gradual angle. file the sides first and then round the tip to a perfect semi-circle.

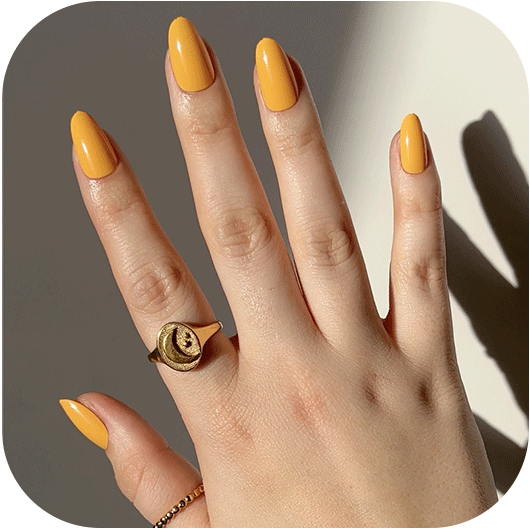
almond nails
an almond shape is sophisticated and hyper-feminine. it’s excellent for boosting length and drama; like high heels for nails! this shape is most successful on long, wide nails (narrow nails tend to look talon-like). because this shape is unnaturally contoured, it’s important to remember that they’re more vulnerable to breaks or cracks. it’s recommended to wear a strong coating like gel or acrylic, or, wear a strengthening base coat like strong start. Image courtesy of @begirda.nails on instagram.
how to do almond shaped nails
an almond nail shape looks as the name would suggest – just like an almond. the nail should be contoured and the tip should be a soft and subtle point. begin by shaping the nail as you would an oval; long and dramatically curved. prevent any slanted or crooked tips by defining the middle of the tip as the highest point of the nail. then, file either side of the tip on an angle towards the middle until a subtle point is achieved.
ballerina nails
if a square and an oval make a squoval shape, then a square and an almond make a ballerina. inspired by the tip of a ballet slipper, the ballerina is a softer, more contemporary long nail option than the almond and if your nails are wide, it adds a bit more refinement and length than the square. it also requires length, so it’s recommended to begin with medium to long nails.
how to do ballerina shaped nails
an easy way to shape a ballerina is to imagine you’re shaping an almond nail, then a squoval. start by filing a dramatically curved tip, keeping the middle of the nail as it’s highest point. slim down the sides of the nail on a straight angle to contour the nail. next, instead of rounding the tip, file it straight across and soften the edges for a perfect ballerina. image courtesy of @snipnails on instagram.